Amish Built Table Restoration
A neighbor down the street decided to build his own dining room table to replace the Amish table and chairs he had been using. He asked me if I would like to have his old table and of course I said yes. The table came with four chairs and two leaves.
Amish built table and chairs made in Holmes County, Ohio.
Materials and Tools Used in this Project
Krud Kutter
SurfPrep 3”x4” Electric Ray Sander
Dewalt Orbital Sander
Bahco 665 Premium Ergonomic Carbide Scraper
Graco TrueCoat 360 Variable Speed Sprayer
Sherwin-Williams Emerald Urethane Trim Enamel - Tricorn Black
Sherwin-Williams Extreme Bond Primer
MINWAX Gloss Polycrylic
MINWAX Pre-Stain
General Finishes Oil Based Stain - Warm Cherry
General Finishes Arm-R-Seal Gloss
StaalMeester 2020 Series Brush
Hula Home Mist Bottle
Vevor Spray Tent
Preparation
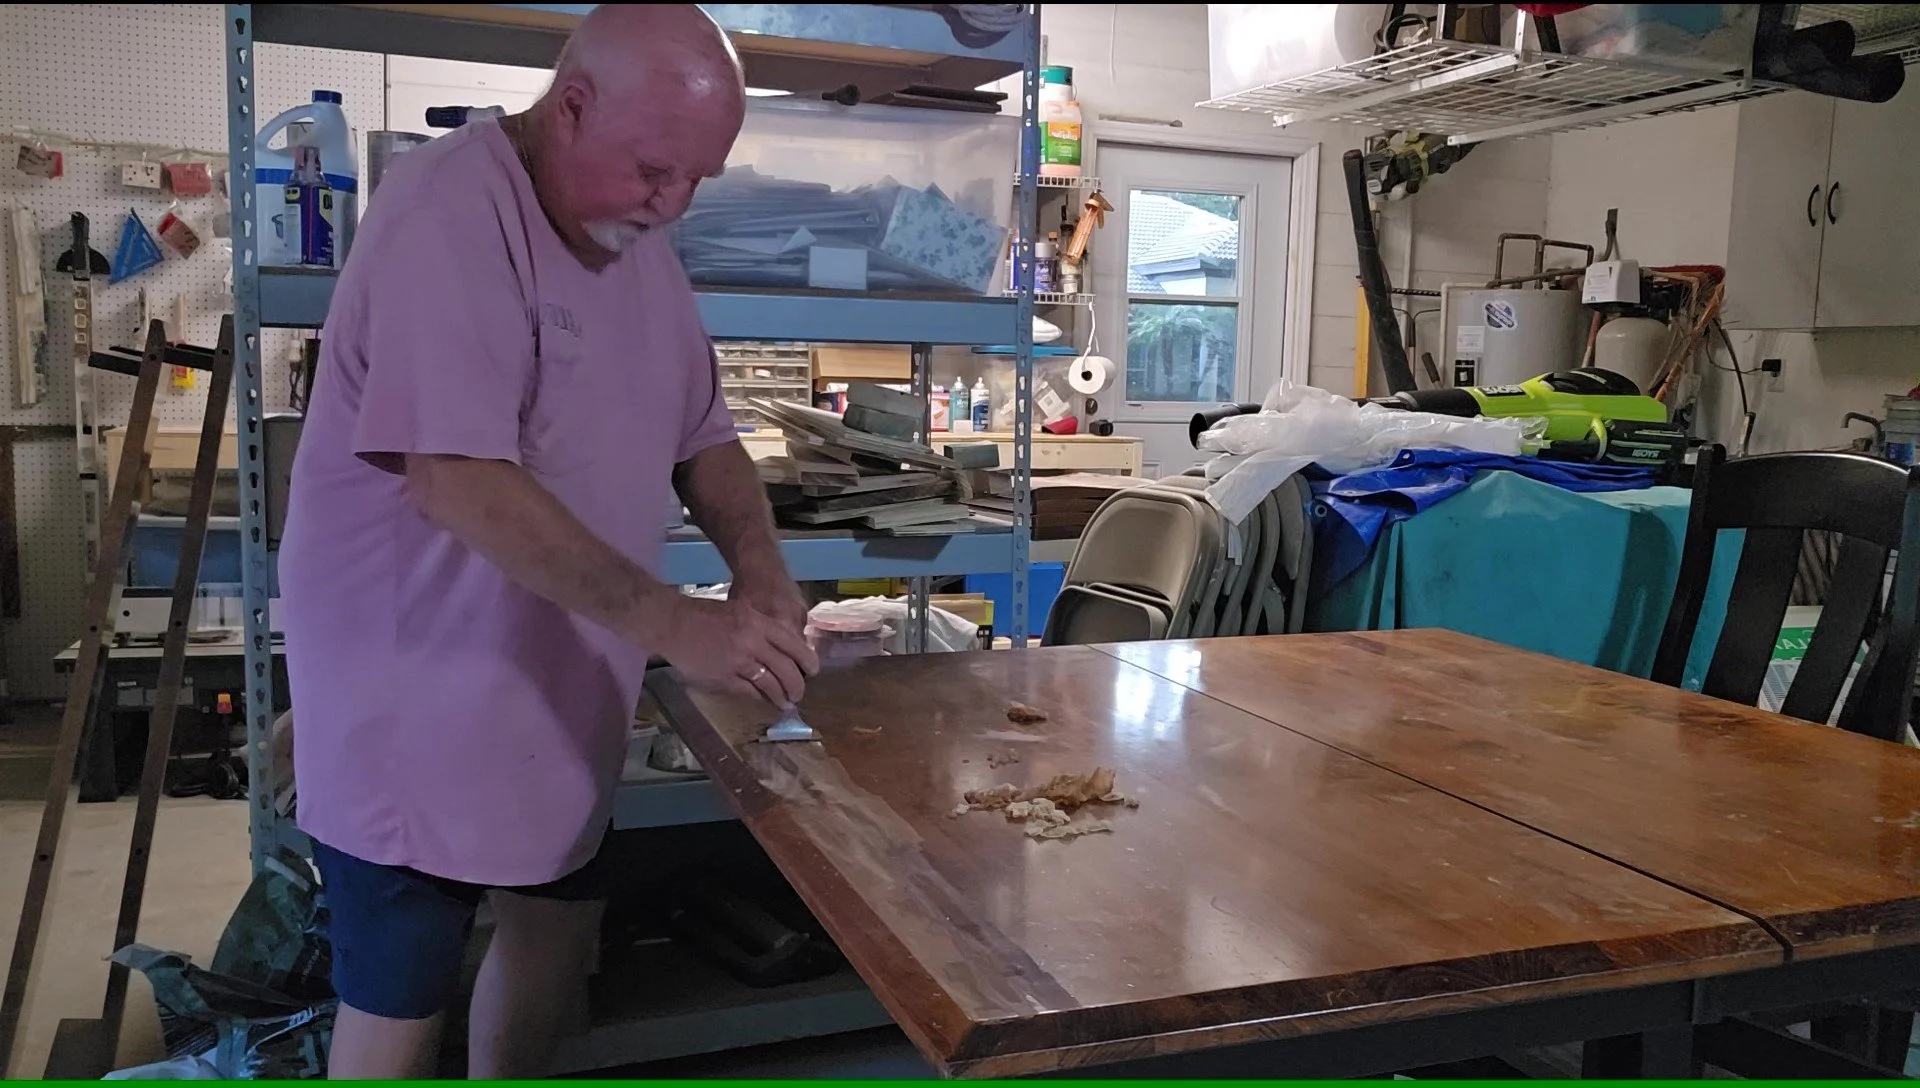
This project is more of a restoration versus a makeover, because I intended to restore the table and chairs close to it’s original finish. So I cleaned with Krud Kutter and began to remove the old finish from the table and chair pads using my Bahco carbide scraper.
Sanding and More Sanding
The carbide scraper worked very well and after getting most of the existing finish off, I started to sand the table top and chair pads down to raw wood in preparation for stain. The biggest area I had to address was sanding down one of the child’s names that she had carved into the table top.
I started out using 80 grit sandpaper and then 120, 180, and 220 on the table top, leaves, and chair pads. I also had to take the table top off of the base and sand the underside as well. I had to do some minor repairs on a couple of the chairs and then scuff sanded the chairs and the table base since I was going to be painting them black.
Force Doesn’t Always Work
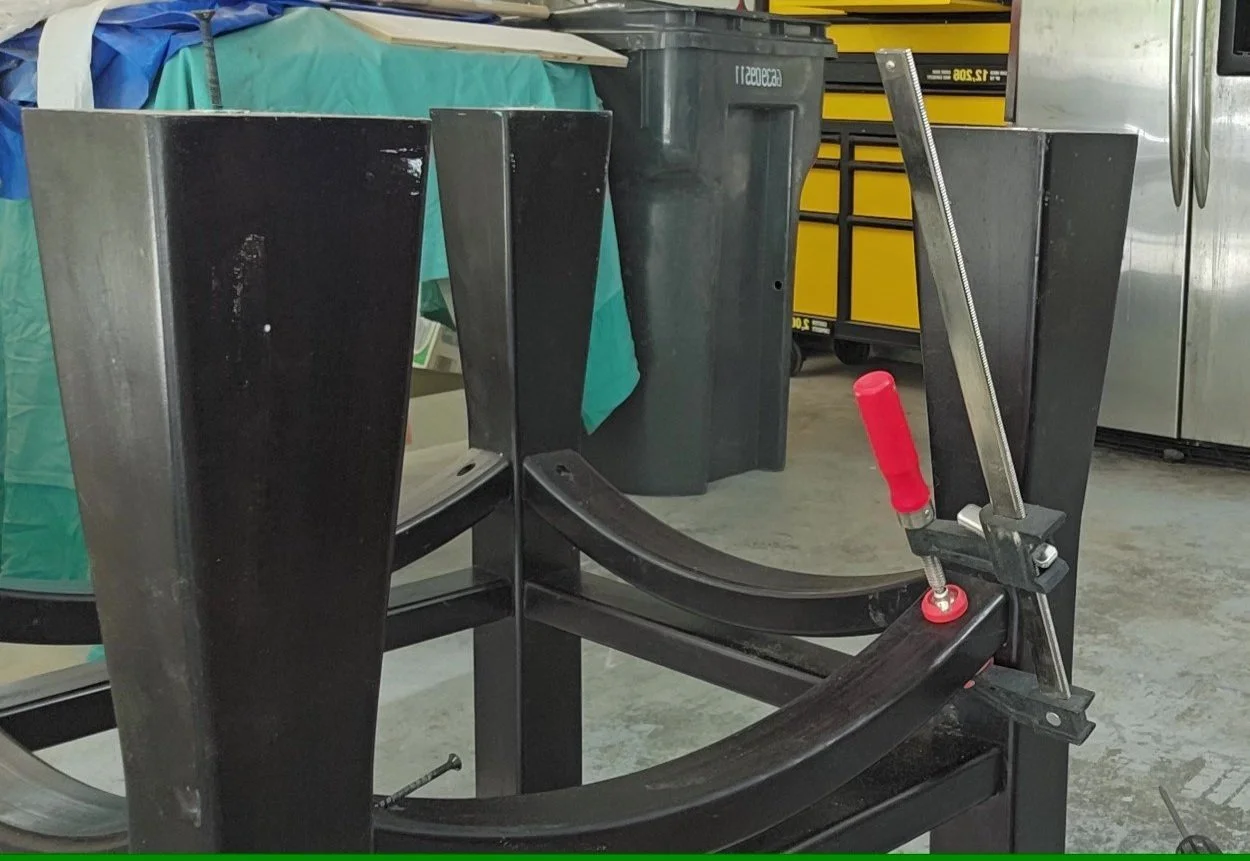
It may be a little hard to see, but the curved braces on the table base are attached using pocket screws. But it turned out there was more. I wanted to remove these braces to make painting a little easier. After removing the pocket screws from one of the braces, it would not budge. So I decided to “loosen” it up a little with a hammer. The result was a cracked brace that I had to glue and repair; hence the clamp you see in the picture. Not a smart move on my part, but it turned out OK.
So after sanding the chairs and base, it was time to prime. I used Sherwin-Williams Extreme Bond Primer and sprayed it using my Graco TrueCoat D360 sprayer. After the primer had dried, I sanded all pieces using my Surfprep sander with 220 grit.
Spraying Disaster
While spraying the primer went well, spraying the Tricorn black not so well. In fact it turned out to be a real disaster, especially for the chairs. I think one of the issues was trying to get all of the chairs mostly covered in one coat. The result was overspray and runs that I did not catch and fix with a brush. At one point my sprayer began spitting paint. Did I have it set to high? Should I have thinned it? I had sprayed this paint before with no issues. It was so bad, that I had to sand quite a few runs and drips down on all four chairs and the base as well. So I decided to use a paint brush, a Staalmeester 2020 paint brush to be specific and a water bottle. I should have done this from the beginning. The results were amazing. As you can see from the photos below, you can see what happens as the paint begins to dry. The finish is near flawless. I posted a YouTube video that you can view for further details. Fixing a Paint Sprayer Disaster.


Applying the Stain
I left stain application till the end. Before staining I applied MINWAX oil based Pre-Stain to help ensure the stain would be absorbed evenly. I let the pre-stain dry and then wiped off any excess. Stain needs to be applied within two hours of applying pre-stain, so I did the seat pads first, then the leaves, and finally the table top.
I applied two coats of stain allowing at least 24 hours between coats. After all stain was applied and dry, I applied three coats of General Finishes Arm-R-Seal in a gloss sheen, sanding very lightly between coats. After the final topcoat had dried for at least three days, I then hand rubbed each piece with #0000 steel wool dipped in a soap and water mixture and then dried with a towel. This final step made all the difference in how smooth the finish was.
The Final Result
This table and chairs took a long time to complete, but I am very pleased with the results.


